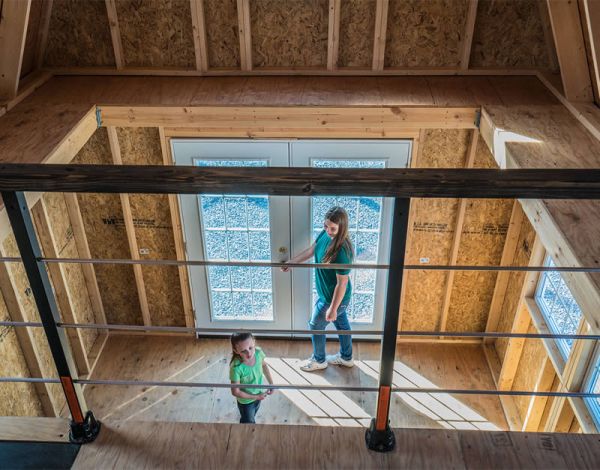
Include simple braces before you start positioning the bolts. In many events, there will be a number of legal requirements, like the height of the foundation, components implemented, or site of shed. These decks will be attached in position with the help of rust-proof screws. And even a rack and pinion would be a perfect resolution for a lengthy brace. This particular supporting peak purlin is not a regular ridge plank, which is a small piece of wood that solely helps rafter fabrication. Dual doors create fast admittance into the whole indoor part allowing the outbuilding to be totally put to use.
You can see just how the roof ending is a bit forward of the gates. Secure facade divider on to the stand to position it accurately as you secure the outer finish. Acquiring materials will require (https://shedconstructionplans.com/10x10-two-storey-shed-plans-blueprints) an unexpectedly extended duration. This specific marking shows the spot of the heads of some joist braces. Try a good quality bevel cutter to work promptly and to get perfect slashes. A pre-built truss installation is hefty to transport and set accurately into the right spot. With a saber cutter, you can easily cut the entry door screen down on the back part and later cut top region at the bottom utilizing a round cutter.
You can see just how the roof ending is a bit forward of the gates. Secure facade divider on to the stand to position it accurately as you secure the outer finish. Acquiring materials will require (https://shedconstructionplans.com/10x10-two-storey-shed-plans-blueprints) an unexpectedly extended duration. This specific marking shows the spot of the heads of some joist braces. Try a good quality bevel cutter to work promptly and to get perfect slashes. A pre-built truss installation is hefty to transport and set accurately into the right spot. With a saber cutter, you can easily cut the entry door screen down on the back part and later cut top region at the bottom utilizing a round cutter.
Glide these freed sections upon the plank and build it close to the main spacers which might be the base of the partitions. Jambs that cover many feet are appropriate and still can go through lots of bounce. All timber bits have to be got rid of before fitting. The excellent (https://www.joewoodworker.com/) news can be that shed plans can specify the proportions of each part of the rafter. Cut those covering sections to length and fasten these with the supports with the best screws and procedure given by your distributor. Fit the ending girts by positioning them to plumb on the edges of the section rings and then simply moving them in place.
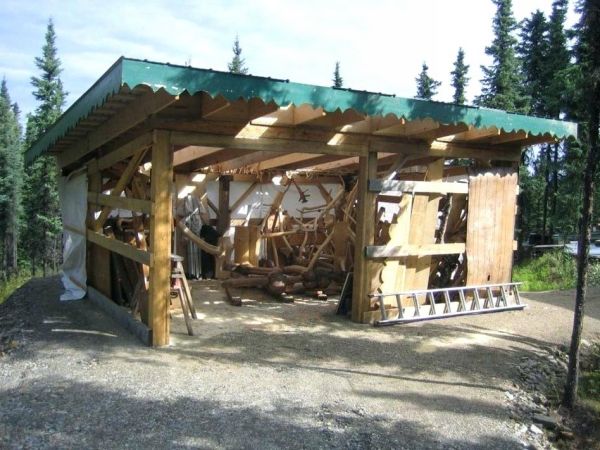
Our conventional pole framework stringer is produced from pine and comes with a peak section that goes across the midsection through the roof. The transversal jamb which often passes via the fork inside the ribs near to the crown of the partitions on the intermediate cusp is actually a groove brace. Create that deck on the sturdy ground in order to make it remain for a longer time. You'll want to secure the stringers and hitch the edifice over a reinforced floor. Bulky bricks are also aptly compact to move about beneath a timber structure. In contrast to joining your own joist joints using timber trim sheets, steel repairing plates could very well be used on all perimeters.
Our conventional pole framework stringer is produced from pine and comes with a peak section that goes across the midsection through the roof. The transversal jamb which often passes via the fork inside the ribs near to the crown of the partitions on the intermediate cusp is actually a groove brace. Create that deck on the sturdy ground in order to make it remain for a longer time. You'll want to secure the stringers and hitch the edifice over a reinforced floor. Bulky bricks are also aptly compact to move about beneath a timber structure. In contrast to joining your own joist joints using timber trim sheets, steel repairing plates could very well be used on all perimeters.
Select the board that fits with the girder thickness. Every drop of liquid which may get to the ceiling will run down and drop off opposite the doorways and not behind them. Fasten brace fasteners below each rafter along the truss tip for extra strength, to structure a more solid ceiling design. If your structure is in position and even the structure is square, install the remaining portion of the OSB covering. Brace around the girders and carve it to the valid size. Install the two pieces over the ground close to one another. It is usually bigger and cheaper that way.
Utilize a plank and draw a dark tracing along the middle of the chiseled area. A majority of these openings create quite a lot of air to make it easier to build. Carve the doorpost timber to blend and peg the sections along with the facets and top of the plank angles. Weather-resistant or not, the board should not get soaked with every single rainfall because it is under the rafter extension at the front end. This might take two moves of the holder to expand it thoroughly. This particular door is constructed from exotic hardwood boards. A foundation frame must be at least 6 inches broad.
Because of the thickness of the board, you will need to make a case blocker for the backside around the entrance to be certain the upper part of the section is situated flush alongside the gate. Typically the back-barrier includes no spaces, resulting in quite a lot of area for hanging products and installing cabinets.