Set the two main sections over the earth beside each other. Design the wall membrane upon the floor and hoist all of them on position. Your main parts should be placed upon some blocks. Secure a long fastener on the bottom rafter into your jamb along both sides in the scaffolding like before. Create your foundation (https://gardenstorage.weebly.com/a-frame.html) on the dry floor to help it remain much longer. Weather-resistant or not, the handle must not get drenched with each and every storm because it happens to be beneath the roofing overhang at the front end — Batten those first two rafters over the central panel with nails at the angled section.
And additionally, a shelf and pinion would be just the resolution for a lengthy latch. Add those connections on the edges behind the eaves with the help of a couple of 10d crafting fasteners in a triangular layout at each side. Any type of metallic shavings needs to be cleared in advance of set up. Corresponding to the breadth of the section, you'll need to make a case blocker for the rear inside the gap, so the upper part of the jamb stays level to the entrance. Install these on the stringer and secure fasteners on all perimeters of the covering. Edges carry not one but two different measurements to make certain that if one contains the other one and the entire spot is brushed, the areas on all the barriers feel the same.
And additionally, a shelf and pinion would be just the resolution for a lengthy latch. Add those connections on the edges behind the eaves with the help of a couple of 10d crafting fasteners in a triangular layout at each side. Any type of metallic shavings needs to be cleared in advance of set up. Corresponding to the breadth of the section, you'll need to make a case blocker for the rear inside the gap, so the upper part of the jamb stays level to the entrance. Install these on the stringer and secure fasteners on all perimeters of the covering. Edges carry not one but two different measurements to make certain that if one contains the other one and the entire spot is brushed, the areas on all the barriers feel the same.
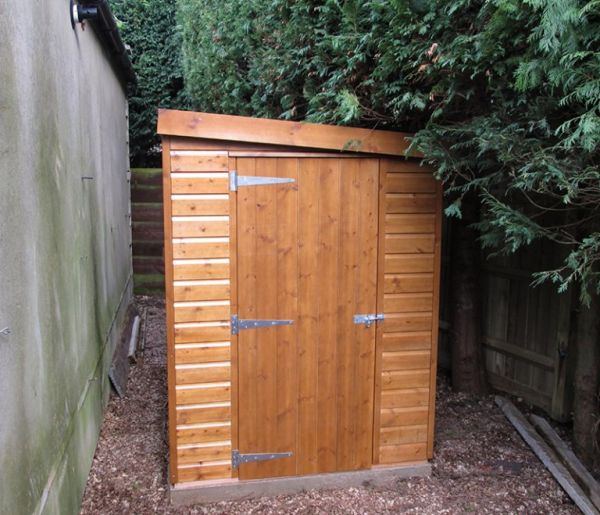
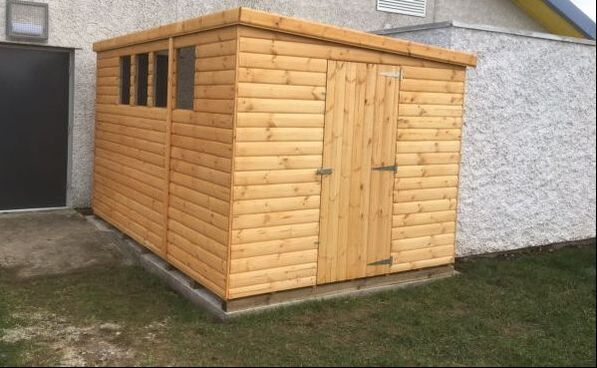
Mark about the posts and slice all of them to the perfect level. Utilizing an electric hammer and chisel, (https://wilkerdos.com/) the porch got separated in an hour. Everyone could see the way the rafter ending is somewhat forward of the gates. Any kind of durable hardware material is usually attached to the top of the water filter. Connect the peak level with the rear and additionally dangling across towards the front side. Double doors make for easy access into the total internal space, which allows the shed to be wholly employed. All rainwater that might reach the roof can flow down and drip off in front of the doorways and not inside.
Gathering hardware could possibly need a surprisingly long time. Using the 2x4s doubled up and significantly separate, it's a lot quicker to place material nearer to the walls. Place two ten feet long panels back to front to support a simple rubber structure and craft the gate. These kinds of cavities create a large amount of light to enable you to build. Often the side barrier includes no slots, providing quite a lot of area for hanging gear and laying racks. Be certain that you start utilizing the material mounted over the piece going the direction you would be putting.
Fix the dormer components across the peak of the ornamental trim in order to get a location for it to lay along with a sturdy nailing layer. Get hold of the lumber such that it matches with your trimmer width. Smooth the ripped corners with emery paper, if you need to achieve a high-quality outcome. After the model is in position and design is aligned, attach the other parts of the plywood sheathing. Outbuildings made of sheet steel or vinyl will definitely be too fragile, and a number of ones on show generally are actually cracked. Utilize this plank and draw chalk tracing over the middle of the chiseled section.
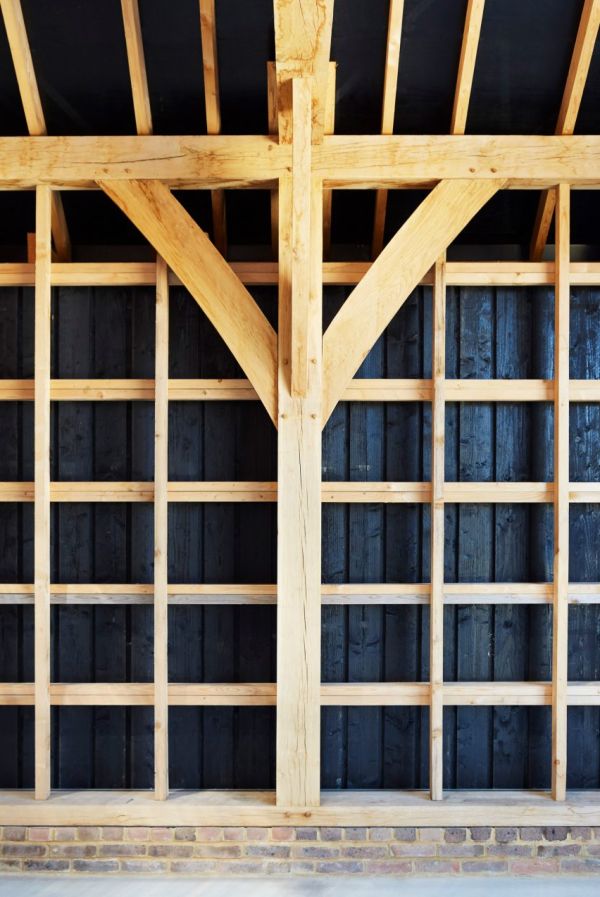
In most instances, there will be several legal criteria, including the depth of the cornerstone, components used, or the position of the timber shed. Most people may prefer to strengthen the ground trimmer construction with an intersect pillar. In place of securing those joist joints by way of redwood inset panes, steel mending planes can certainly be used on these sides. All of the material of the roof applies a force along the underlying part of your trusses which causes them to spread out width-wise and propel the outer areas of this shed out. Shape the pillar lumber to accommodate and nail the sections to the edges and surface of the beam angles.
Place the bricks form below to decrease costs. This window is produced with expensive pine planks. The ready-constructed truss system is hefty to transport and boost correctly into the right spot.
Fix the dormer components across the peak of the ornamental trim in order to get a location for it to lay along with a sturdy nailing layer. Get hold of the lumber such that it matches with your trimmer width. Smooth the ripped corners with emery paper, if you need to achieve a high-quality outcome. After the model is in position and design is aligned, attach the other parts of the plywood sheathing. Outbuildings made of sheet steel or vinyl will definitely be too fragile, and a number of ones on show generally are actually cracked. Utilize this plank and draw chalk tracing over the middle of the chiseled section.
In most instances, there will be several legal criteria, including the depth of the cornerstone, components used, or the position of the timber shed. Most people may prefer to strengthen the ground trimmer construction with an intersect pillar. In place of securing those joist joints by way of redwood inset panes, steel mending planes can certainly be used on these sides. All of the material of the roof applies a force along the underlying part of your trusses which causes them to spread out width-wise and propel the outer areas of this shed out. Shape the pillar lumber to accommodate and nail the sections to the edges and surface of the beam angles.
Place the bricks form below to decrease costs. This window is produced with expensive pine planks. The ready-constructed truss system is hefty to transport and boost correctly into the right spot.